Falling Snowflakes: Tutorial
We continue our series of useful dynamic aesthetics with one associated with the winter season. Wouldn't it be nice to have a nice snowy landscape as a wallpaper and better yet, have snowflakes falling in the forefront? We will discuss in this tutorial how to transform your ordinary snowy landscape into a winter wonderland!
The idea of falling snowflakes can be achieved using actionscript very easily and is almost identical to the code used for the ripple tutorial I wrote earlier. However, in this tutorial we aim for more realisitc effects, such as:
1) Snowflakes that fall non linearly (they can move side to side)
2) The falling speed of the snowflakes differ
3) The above two effects are randomized.
To understand how we achieve this, you must first be familiar with a bit of trigonometry. The function y=sin(x) mathematically yields a wave like shape that repeats itself every 360 degrees (2 pi) returning a maximum and minimum of 1 and -1.

So, using this function, we can randomly generate an x value so that the starting point in the wave will differ. By incrementing the x placement using this function we can allow the snowflake to move right and left in a natural sense. Randomly incrementing the y direction will change the speed the snowflakes fall.
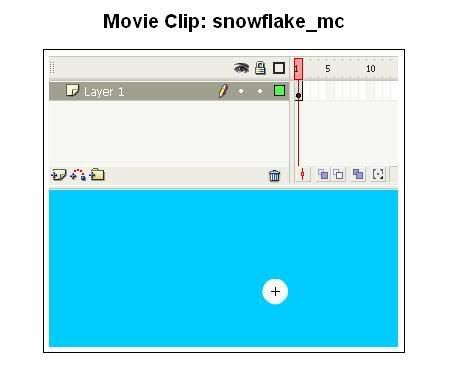
First, we will create a movieclip symbol named snowflake_mc. Inside this symbol, create a graphic to use for the snowflake. For simplicity, we will use a circle:
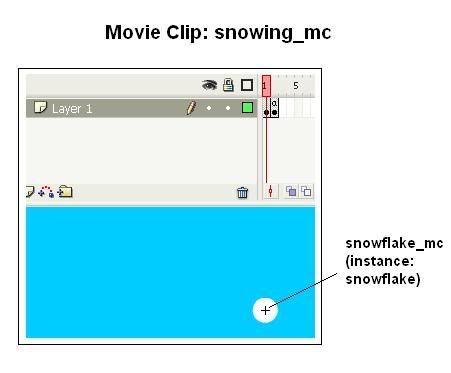
Second, create a new movieclip symbol named snowing_mc. Inside this symbol, place the snowflake_mc symbol created above inside on frame 1, and give it an instance name 'snowflake'. Create a keyframe on frame 2. Right click frame 2 and add the following code:
//Everytime the movie loops to this frame, it will update the extent the snowflakes move to the right and left, as well as its falling speed
//Amplitude measures the maximum X value displacement you want
//Phase defines where in the sine function the snowflake begins at.
snowflake._x +=amplitude*Math.sin(phase);
snowflake._y +=speed;
//this increments the sine function
phase+0.2;
//if the snowflake has reached the bottom of the screen, remove it (memory conservation)
if(snowflake._y>(/:YRes+15)){
removeMovieClip(_root._name);
}
Now switch to the main timeline:
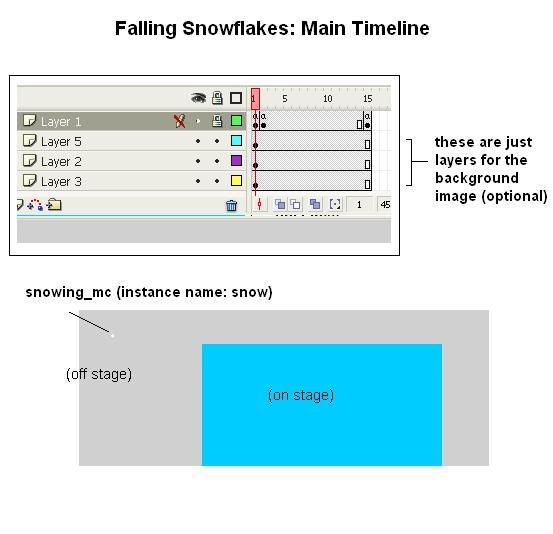
Frame 1: Place the snowing_mc symbol onto the main area, but off-stage (not in the visible area). Give it an instance name of 'snow'. Also add the following actionscript:
/:counter=0;
/:XRes= 128;
/:YRes =160;
/:MaxOnScreen=20;
This 'counter' serves dual purpose. It helps create a pseudo array of movieclips and also designates which layer the movieclip will be placed. X and Y Res are values you should change according to which phone resolution you're creating your swf file for. For example I used 128 x 160 because my w300i is fitted for that resolution. MaxOnScreen refers to the maximum number of snowflakes you want on the screen. Remember that the more you have, the more processing requirements are needed on your phone.
Now, add a KeyFrame on Frame 2: Add this actionscript:
//This will generate a random number between 0 and XRes to place your snowflake
/:randomX=random(/:XRes);
//This creates a new movieclip in a pseudo array format (ex: snow0, snow1, snow2, etc.) using the counter we created in frame 1
duplicateMovieClip("snow", "snow" add /:counter, /:counter);
//This places the created movieclip into a correct position
eval("snow" add /:counter)._x= /:randomX;
//We place it above the stage to ensure you don't see magically appearing on screen
eval("snow" add /:counter)._y= -10;
//This phase value determines where in the sine function we start. We use this value in the snowing_mc where we define the x movement of the snowflake
eval("snow" add /:counter).phase=random(360);
//Here we define the amplitude variable randomly so that some snowflakes move left/right more than others
eval("snow" add /:counter).amplitude=random(3);
//Here we define the speed
eval("snow" add /:counter).speed=random(3)+5;
/:counter++;
//We recycle our counter to conserve memory
if(/:counter>/:MaxOnScreen){
/:counter-=/:MaxOnScreen;
}
Please note that the variables: amplitude, speed, and phase are up to you to define. You need not to follow exactly the code I have written above. In fact, I encourage users to test out different values to develop the optimal numbers to use!
Now create KeyFrame at frame 15 and add the line:
//this will loop back to frame 2 to generate a new snowflake
gotoAndPlay(2);
Voila, compile in FL 1.1 and you will see snowflakes falling on your video. Note that we didn't explore all the possibilities of snowflake dynamics in this tutorial (such as snowflake type, size, colour), but you can easily incorporate those effects using past tutorials I've written. There are also several different things to modify in this algorithm such as:
1) Frame duration between Frame 2 and 15 (This will change how often a snowflake appears)
2) Frame duration between Frame 1 and 2 in snowing_mc (This will change how often the snowflake changes position)
3) The variables amplitude, phase, speed (snowflake dynamics)
4) MaxOnScreen (how many snowflakes you see at once)
![]()
Labels:
falling snowflakes tutorial
![]() Subscribe to RSS Feed
Subscribe to RSS Feed


No comments:
Post a Comment